Warning: Use this procedure at your own risk. I would prefer that dSLR manufacturers provide and/or document more effective ways to clean dirty sensors. I suspect that low level support technicians may give strident warnings that are factually untrue, because the individual doesn't really know what works, and the company doesn't want to asssume responsibility for the user performing this procedure, because if its complexity and moderate difficulty.
Warning: All my reading say not to use compressed air. The propellents chill the air, and the moisture from condensation can cause problems. Also, you can blow hard enough to damage the camera.
In the future, if a bulb blower doesn't work, I'll use the method below. You may be able to find a camera repair shop to undertake this process if you're not comfortable with it. I won't send it to the Canon for their cleaning procedure. They don't seem to have a reasonable standard for a maximum level of dirt acceptable on a "cleaned" sensor. For all I know, the real technicians who actually do the work may use a procedure very similar to this. Perhaps I just repeated the process until I got a better result. I'm a klutz, but felt reasonably safe with the procedure, emboldened by the website in the link below.
I sent a Canon D60 to the shop to have it's sensor cleaned, and it came back without much improvement. Here are 100% pixels images which show my dirtiest areas after various cleaning procedures:
1. After "cleaning" by blowing method recommended by Canon:
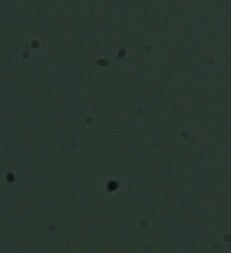
2. After Canon Factory Service Cleaning:
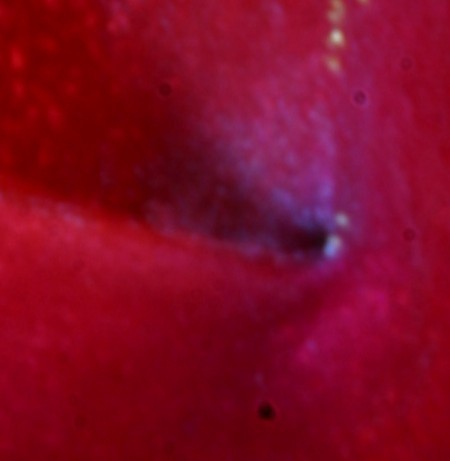
3. After wiping with spatula/Pec*Pad/Eclipse fluid here is the only spot I could find:

Eclipse cleaner and Pec*Pad, homemade swab made from a pad and a tiny rubber spatula are the recommended method that I've read, and actually tried myself. I had severe dirt on my sensor, it was worthless to me unless I got it clean, so I risked it. It worked great. I cleaned it with about 16 homemade swabs, 1 swipe per swab, using the recommended method. I gradually increased the pressure over this process until I cleaned it successfully. Now that I know how, and have the "feel", I won't hesitate to do it again. I have one large but much fainter persistent spot, and I think that it may go away over time as I repeat this process. An illuminated 10x magnifier makes it easier to directly see the spots, so you don't have to keep mounting a lens to check your results.
I'd especially like to hear any problems anybody has using this technique. I'll try to post constructive warnings here, if it doesn't become too burdensome. Obvously, you must modify or adapt the sensor cleaning instructions of your particular digital SLR to this method. In particular, do NOT use a "time exposure" to expose the sensor for cleaning. On most dSLR cameras, the sensor cleaning mode exposes the sensor for an indefinite period of time with less risk that the camera will end the exposure. Loss of power during cleaning would be catastrophic. Sensor cleaning mode should keep the sensor de-energized, which should make cleaning easier, because the a functional CCD sensor has a charge of electricity. which attracts dust.
Here's a link to the web site where I found the swabbing process described:
ccd cleaning
You should read the descriptions at this site. My information just supplements theirs.
here's a link where I found the pads and cleaning fluid for sale online:
Imaging Spectrum
I found the pads and cleaning fluid at a local camera store.
My variations and expansion from the website's instructions:
1. The instructions show using a full pad folded on the spatula to build a swab. I found it more convient and "neat" to use 1/4 of a pad. The excess just tends to make it harder to get nice neat "hospital" corners when folding the pad on the spatula.
2. I found, with my very tenacious dirt, that I had to press fairly firmly before I got the dirt off. However, being timid with my camera, I started off very light, and built up to a fairly firm pressure. Obviously, applying too much pressure would be a bad thing, and that's what's good about the rubber spatula. It helps to apply a uniform pressure, and limits the extremes, somewhat. Still, I had to press more firmly than I would have expected to remove the dirt. Dust will probably come off with very light pressure. I think my specks were red georgia clay! It adhered all too well, and the pure methanol of the cleaner may not contain a "soapy" wetting agent to help it clean well.
3. I found that putting a drop near each corner seemed to work well. The bottle dispenses large drops, and you don't want to use too much.
4. I tried to swab the sensor quite quickly after applying the drops. I wanted the pad to be wet, not dry, when used, to minimize abrasion.
5. Before cutting the rubber spatula to size, I made a paper template, to "measure" the size that the spatula should be. This was intentionally a few millimeters narrower than the sensor, so that the folded pad on the spatula would fit in the sensor "pan" with just a little clearance.
6. When cutting the rubber spatula to size, I used a brand new razor knife blade, and I lubricated the spatula and the knife with vegetable oil so that the knife would cut the rubber more easily. I used vegetable oil instead of a petrolium based lubricant because I knew that vegetable oil would not dissolve the plastic in the cheap plastic spatula.
7. I found the preferred brand of spatulas at WalMart, as stated in the web page. They are in a set of 4 different sized spatulas. The smallest one is the one you want. It is in a red and white package, with a black logo at the lower right hand corner that says "Robinson Knife Company". On the back, next to the bar code is a part number 7691. The spatulas are white rubber, with white plastic handles. This places too much emphasis on the brand of spatula, I think that the solvent and the pads are probably much more important.
8. I held my knife at an angle, using a metal straightedge, to create an angled cut to produce a "chisel" tip on the squared-off tip of the spatula. This is the only critical part of the "swab/spatula" tool. I used 600 grit wet or dry to "sharpen" the chisel edge, because of the roughness of my knife cut. I "honed" the sharpened knife on my more or less clean polyester trousers, to make sure that any grit was removed, and then washed the spatula thoroughly in soap and water to remove the vegetable oil and remaining grit.
9. As shown on the website, I folded my corners at a 10 degree angle. Unlike the website, I offset the spatula from the center line so that the first fold (say on my left side) would NOT reach th right side of the spatula. I found that the wipe remained tighter on the spatula when I did this. Then I folded the right side toward the left, "tucking in" the folded left side, and continued winding the excess tightly around the spatula. Then I taped the exposed edge with a piece of "cellophane" tape. I was very careful to keep the tape about 1/8th of an inch from the tip of the spatula, to make sure that the adhesive from the tape didn't get on the sensor. This might be another reason to keep the use of fluid to a minimum, and to work quickly once the pad has been moistened.
10. I tried to always wipe the sensor from right to left. However, on the wipe before my last wipe, I also wiped the right edge from top to bottom, to make sure that the right edge was clean.
11. I used a new pad for each wipe. I only wiped ONCE, to minimize abrasion, and to maximize absorbtion of dirt and dust into the pad.